Showing posts with label kitchen. Show all posts

5.15.2015

RUSTIC INDUSTRIAL KITCHEN


There's something about this kitchen. For a long time, I wasn't sure it was going to work out. Early on we discovered half the room had no foundation, and then there was the fireplace fiasco, and we seemed to hit a dozen other speed bumps along the way. And now somehow, in the blur of the past 6 years, we're done and everything is legit! 

We still need to install the pulls on the cabinet doors under and flanking the range top, but for now I'm just thrilled that all the tools and dust are finally gone. (The kitchen has been our makeshift workshop--again--for about 6 months now.) 

In addition to having floor drains, which allow for easy cleanup, we also have a ceiling outlet hanging over the island. It's not the prettiest thing, but so very useful!

I made the little sink skirt out of a canvas drop cloth last week. I'm still undecided about whether I like it or not, but I thought some prospective buyers might not like seeing exposed plumbing. It does add some softness to the room, which is kind of nice in relation to all the concrete and stainless steel. 


I didn't do the stained stair runner as planned, because I didn't know if that would be universally liked, but I still love how this staircase and pantry corner turned out.


I know it's not everyone's style by any means, but I'm really happy with how it turned out overall! What do you think?

12.02.2014

CABINETS AND CHRISTMAS THINGS

Is blogging dead? I don't know, but my blog is certainly taking a back burner lately. Speaking of burners, we've been stoveless (again) the past week. I snapped this with my phone on Saturday, one of the rare days when I am actually home during daylight hours.


Ez is currently building the cabinets for underneath the rangetop as well as the small cabinets flanking either side. (Our stove had previously been sitting on a semi-level stainless steel work table--workable but not ideal.) We'll be using butcher block for the countertops and a combination of white-painted pine and salvaged planks for the facing. Butcher block and reclaimed wood are probably on their way out, trend-wise, but if they will work in any house it's certainly ours.

I am looking forward to having this fairly major improvement checked off the list. It'll be much more convenient for cooking (though I've been lying around lately more than I've been cooking) and much tidier too. Having a place to put things is always nice, especially because I'm kind of a messy cook.

This is also one of the critical projects on our Resale To Do List. I will spare you the full list, but it includes things like closet shelving, installing the master bath tub, filling nail holes and painting baseboards, etc. -- mostly manageable things, I think. I have not been much help so far considering the extreme nausea and exhaustion, but thankfully I do feel a lot better than I had been. I'm officially in the second trimester, and I am spending less and less time on the couch just in time for the holidays. Which is really good, because the clutter and dust bunnies have been piling up, despite Ez's dedicated attempts to pick up my slack.

Aside from cleaning, Johnnie and I have been slowly working on our Christmas tree the past few days. In 8 years of marriage, this is only the second time Ez and I have put up a Christmas tree. Between continual renovation and spending Christmas mornings elsewhere, we haven't felt like putting in the effort. Now that Johnnie is 3 and gets excited about every little thing, we decided to stop being so austere. She picked out the colorful balls at Target, and together we cut the matching paper strips to make the chain. She's getting so good with scissors!

HomeGoods stools for reaching upper branches! And we still need to stain the steps and build a railing...
And while Ez was working on the kitchen cabinets, J and I also baked salt dough ornaments, which we then spent hours painting and glitter-gluing within an inch of their lives. After I shellac them, they'll go on the tree as well. So our bright and colorful tree is still very much a work in progress. Much like everything!


5.05.2014

KITCHEN THINGS


It's been awhile, so here's a recent photo of the kitchen. I hope you like authenticity, because I didn't bother clearing our snacks from the island or tucking the unsightly things of everyday life out of the way.

The kitchen's really not finished, but it works for now and has decent natural light thanks to the giant front window. Before our Easter guests arrived, we rented an industrial buffer to deep clean the concrete floor. Even with regular vacuuming and steam mopping, the kitchen floor hasn't felt truly clean since approximately three days after it was poured. Considering how much construction gunk has been produced since its installation, the floor was really due for a hardcore scrubbing.


I'm so glad we did it! Now Johnnie can walk around barefoot without my "paranoid mom alert" going off, although now I'm tempted to buy our very own floor buffer, which I'm sure is neither cheap nor easy to store. I also completely love having a floor drain, which made this deep cleaning process much easier.

Things we still need to do in the kitchen:
  • Build a real base cabinet for the range area, with counter space on either side.
  • Build shelving in the pantry (right now it's just open space)
  • Build shelving inside the oven cabinets (again, it's just open space right now)
  • Hang the pendant light over the baking table. We have it. We just need to hang it. Pathetic.
  • Patch a crack in the floor (a pitfall of concrete even with all precautions taken) and reseal it.
I guess that's not really too much, but most of these are critical organizational tasks. Right now we only have one lonely little drawer, where we keep our flatware -- though the crates under the island are basically drawers, too -- and all our dry and canned foods are crammed together in what limited shelf space we have. I don't believe having a more organized kitchen will make me a better cook, but no longer having to dig around for my ingredients may at least make cooking more enjoyable. That'll be nice.

We'll get there soon enough. A higher priority right now is a railing for the front porch. I'm really thankful we've made it through two winters without anyone falling down our icy stairs with nothing to hold onto. For safety's sake, we're finally getting ready to tackle that little oversight. Alas, it will probably not involve custom ironwork, my preference of course, but oh well. For now I'll settle for nobody tumbling to their doom. You're welcome, family.


1.17.2014

A RARE VIEW


This is not an angle I've shown much (or ever?) on the blog, so, like, feast your eyes on these high quality iPhone pics. This doorway leads from the dining room into the kitchen. To the right of these photos are the stairs leading down into the living room.


I love how you can see the brick fireplace and the old door from this angle. That old door! It's possibly my favorite thing now. At times I've worried the kitchen would turn out to be too weird or too "cold," but I think it's coming together.

We started sanding the floors last night in preparation for stain and finish. (I'm so thankful Johnnie sleeps right through the sound of power tools...) It goes pretty quickly with the giant floor sander we rented, but it's not my favorite job. I keep worrying the sander will leave swirls or visible marks in the wood, which is kind of hard to tell until you actually put the stain on. Thankfully you can always sand those marks by hand, but with like six rooms of flooring to stain, I'd prefer to have as little hand sanding to do as possible!


12.31.2013

MY FAVORITE CORNER


Though it isn't completely done yet, this is quickly becoming my favorite little corner of the house. I've mentioned before how tricky it was to configure the stairwell, the railings and all the carpentry involved. (That's why we saved it for one of the last big projects.) I can honestly say it was worth all the headaches and all the time spent staring at a whole bunch of ugliness.

Let's take a little journey, shall we? Here it was before, during the demo phase, five years ago: 

And a little more exposed... This was just before we poured the first of two batches of concrete for the kitchen foundation (previously nonexistent) and finally the floor. Hence all the wire mesh on the ground. 

And more demo... (Wasn't the fireplace adorable before? I still wish it could've stayed that way, but alas, it wasn't structurally sound and had to be rebuilt.)

A jumble of wires and some new stairs at the bottom... We had to add more stairs because we raised the very low ceiling. 

And here it is today. It looks like it was a pretty simple project, perhaps like it's always been this way, and that's a very good thing. It was almost a major disaster and another series of compromises. The permit inspector originally said the pantry wall would have to jut out at least another foot because the electrical box needed more clearance from the front. I was not thrilled. But because of the placement of the pantry door (directly in front of the electrical box) he said that could count as the clearance and we could put the wall where we wanted it -- directly in line with the fireplace. Phew. 


We'll be ringing in the New Year with more house projects, stopping to watch the ball drop tonight and then resuming tomorrow. Not that I mind. Things are looking so very good, it's been great motivation to keep going and checking things off the list.

My New Year's resolution is pretty simple: to finally settle in and enjoy living here. We're almost to the point where that will be possible!

Happy New Year!

12.26.2013

CHRISTMAS AND SUCH

I hope you've all had the most wonderful Christmas!

I don't quite know how to describe ours... Last week we welcomed the sweetest new niece into the world; this week we are mourning Ez's beloved Pop, the original Ez, who passed away on Monday after a few months of declining health. Pop was a happy-go-lucky sort of guy, and one thing I'll never forget is how he greeted everyone he loved with a kiss right on the mouth. (That took some getting used to, and only Pop could get away with it.) Planning a memorial service between Christmas parties and presents is a bit disorienting. This morning I was arranging a collage of photos for Pop's memorial service, and then a few minutes later I was cooing over my 10-day-old niece. I am reminded that without death, there'd be no room for new babies. Thank you, Jesus.

Despite everything, we're still in finish-the-house mode, and we're hoping for our appraisal on January 6th. In fact, after the Christmas morning festivities, Ez and I spent several hours working on the house while Johnnie napped and played with her cousins. We're tired, but we're doing okay. (And my girl's excitement on Christmas morning was such a spirit-lifter! A photo or two to come.)

I am loving -- LOVING -- how the kitchen stairs and pantry are turning out... My dad and Ez spent many hours figuring out how to make it all work before a single board was even cut, and I think Ez basically became a master carpenter as a result of this single corner of the house. I'm so proud of him and the amazing job he did. And that door (along with most of the stairs) is original to the house, which makes me happy. Staining the newel posts and handrails was my Christmas Day project.


Aside from gutters and brick outside (and I'm not sure when those will happen yet since we're hiring someone to do those), we mainly have small, easily manageable things left to do before the appraisal: Installing trim. Cleaning. Painting. Installing balusters for the stair railing. Installing bathroom sinks. All things we can handle. Again, thank you, Jesus.

In the meantime, Johnnie is stirring from her nap, and it's almost time to leave for Pop's viewing. And then there will be a dear little baby who will need her auntie to hold her for a little while... The house will get done, but not today.


10.17.2013

PLANKS AND BEAMS

We have a whole lot of wood planking going on in this house. I wanted real wood planks on the walls in the original part of the house because I felt it would flow better with the exposed log. Sheetrock and exposed log can work together (it's going to have to in our master suite!), but it doesn't feel quite as authentic to me. My vision is not the brown-on-brown wood paneling of the 70s, but planks that are painted white (or antique white) and slightly imperfect. Ez saved a lot of old timbers from the original attic we ripped out and has them set aside for things like beams, trim and accents.

Source: Lonny / Ball & Albanese
I found this image on Pinterest this week, and this pretty much captures the look we're going for in the end. (With fewer skulls.)

Here's the kitchen, for example. In the future we actually plan to add a couple more faux beams like this one on the ceiling as well as some additional trim work, all made from reclaimed timbers. (We aren't going to have enough of our own, but we have some local sources where we can buy some more.)


I love it when I find a pretty photo that captures and validates the vision we're trying to accomplish. It's definitely encouraging to have something inspirational in your sights while you're down in the weeds trying to finish the less glamorous projects. As if anything about this house will ever be "glamorous." ☺


8.27.2013

STRIPPED


Though I barely dared to hope, it looks like my little stained stair runner dream may come true after all! Thanks to Ez for all his hard work and de-leading efforts, the stairs are looking surprisingly not terrible. So I'm doing a major happy dance while trying not to fall to my death since there's no railing up here.

There are a few spots of paint still left that will need to be scraped, then all the stairs need sanding since the PEEL-Away lead paint remover raised the wood grain in several spots. This is probably the ugliest corner of the house right now. I am really excited to think about it looking decent at some point, which, if I'm thinking from your perspective, might be hard to imagine.


However, actually finishing the stairs may be some distance down the pike. (I know. Talk about anticlimactic... Nothing like Daniel's awesome kitchen that he finished in 10 weeks!) We're at a point now where refinancing is finally within sight. We want to get out of our 30-year loan and into a 15-year while the rates are still decently low. While (alas) you don't need an aesthetically pleasing painted stair runner in order to refi, you do need drywall, bathroom floor tile, railings and gutters. Essentials before details! (How many times have I repeated that to myself in the past 5 years?)

Our goal is to get this all done by October. Of this year. 

Ambitious, yes. Are we crazy? Certainly. Is it doable? We're sure gonna try. 

We plan to hire help for the bigger jobs, but in the meantime Ez is knocking out a list of smaller (and less "exciting") projects to get everything ready for these bigger jobs. You can help by praying that everything goes smoothly, quickly and affordably. (And also with minimal dust, but... hahaha.) 

Of course, I'll keep you posted along the way. 

And, just because I don't want to leave you with a post full of raw wood and ugliness, here are some pretty things that caught my eye lately:

Love this black, white and wood kitchen. Via

I'm naturally always curious about log cabin kitchens, and this one has
unexpected teal (my favorite color) cabinets. Via photographer Helen Norman. 

The minimalist in me is getting the warm fuzzies from this kitchen.
But only enough to be absolutely necessary. Via


2.05.2013

RECLAIMED WOOD RANGE HOOD


The deed is done. Just a few hours on Saturday morning and about $10 in 2x2s later, things are looking a little more finished above the stove. Ez crafted a basic frame using the 2x2s and then tacked individual planks of (free) reclaimed wood to create this very rustic and very interesting box to cover the ugliness of the insulated vent pipe above the range hood. It still needs perhaps a coat of stain to bring out the richness and some poly to seal it up, but I couldn't resist sharing these photos with you!


Obviously we need to replace the trim pieces near the ceiling and wash a lot of pots and pans (which usually hang from those handy black hooks on the left-hand wall), but it's coming along. I think this new feature really brings some needed warmth to this side of the room, and if we ever get tired of it down the line it will be easy to uninstall and replace. Win-win.

Looking back on past kitchen posts I realized I never shared the 99% finished wall oven cabinet with you, so here you go. The remaining 1% of the work is simply drilling the holes and hanging the last three door handles. There have been bigger fish to fry, so I'm sure you can understand the procrastination... At least there's one hanging there so you can see the trajectory.


The stainless table under the stove is just a temporary solution. We continually talk/argue about exactly what the final piece is going to look like. In the meantime, this is a semi-functional rigging. I won't lie -- the constant shifting of pans on the bottom shelf drives me nuts, and the current lack of counter space on each side is frustrating. But we make do. After three years, three months and thirteen days without a functioning stove (and very few restaurants nearby to boot), I've learned not to complain too much about minor kitchen inconveniences. I do, however, look forward to nailing down whatever the final solution will be.


So this is the kitchen in its current state. There's still a lot to do, but at least we're getting hot meals and making baby steps forward, which is always encouraging.

I know there were some out there who weren't sold on the reclaimed wood idea for above the stove. What do you guys think now?

1.14.2013

RECLAIMED WOOD RANGE HOOD COVER

Our household spent all last week fighting a spectrum of colds, aches and fevers, so there's not much to report other than the fact that we are alive and, fortunately, feeling somewhat better. I still cannot fully hear out of my right ear thanks to lingering effects of an ear infection, but I can mostly breathe through my nose again -- a luxury I shall never again take for granted. I hope 2013 has gotten off to a healthier start for all of you.

During the downtime, I started making lists. Lists of materials we need to buy (from tile to light fixtures), lists of hidden corners and closets to be organized, lists of projects that have fallen by the wayside, lists of unsolved issues, lists of lists!

One of the unsolved issues was how we were going to finish the area above the range hood. (Sorry for the grainy iPhone dinner-in-progress photo.) You may be relieved to know we are not planning to leave the orange spray foam insulation exposed. There's still a lot to do in this area, like build a more permanent base for the range, but that's a story for another day.


The obvious choice aesthetically would be a big stainless steel box, but we both had some hesitations about it. Primarily, those are really expensive considering their lack of actual function. I'm willing to pay a little more for something if it offers a functional benefit, but in this case, the stainless does not. So if I could find a more reasonably priced solution we liked as much as the stainless, then that's the direction we'd go.

Awhile back, before Pinterest, I'd seen a picture of a kitchen with a rustic wood treatment above a stainless hood. I can't find that particular photo anywhere on the internet now, but I did manage to find some others in a similar vein -- especially the first one shown below.


Source: Uploaded by user via Emily on Pinterest


Source: bhg.com via Emily on Pinterest

The rustic hood looks so good in each of the rooms above, I think any other choice of hood treatment would've actually been a mistake. I can't picture a stainless or white option in any of these kitchens without thinking something would be missing. Though at first I was not quite sure about this look for our kitchen, it is appealing to me a lot more now because it would bring a strong wood element to that side of the room to echo the exposed logs on the opposite wall. You know, balance and such.

So that's the idea we're leaning toward at the moment. Where it lands on the priority list is to be determined... Ez made some nice progress in the dining room over the weekend, and we're hoping to keep that momentum going. Stay tuned for (eventual) updates. (You know we're slow over here.)

What do you guys think? Do you like the look of a rustic wood range hood, or is it crossing the line into weirdness?

7.04.2012

Kitchen Things: Progress and Setbacks


So we broke down and bought a dishwasher a few months ago. We were going to do without one for awhile, but all those baby bottles that need sterilizing on a daily basis finally broke our spirits. It's a Maytag something or other with a "sterilizing" option, purchased during an appliance sale at Home Depot. I'm too lazy to look up the model, but if you'd really like to know the details I can get up from this comfy couch, where I seldom have a chance to sit anymore, and look just for you because I love you that much. This dishwasher is not freestanding (those are astronomically expensive) and therefore it needs to have a small box built around it (probably wood), but LOOK HOW IT FITS RIGHT UNDER THE DRAINBOARD!!! I tell you, this giant sink + dishwasher combo is a slice of heaven. It's not the prettiest arrangement destined for the pages of Dwell, but holy cow is it functional.


Above you can see how the sides of the dishwasher are still temporarily exposed. I'm so happy to have a functioning dishwasher that you wouldn't believe how little I care about that right now...

You can also tell from these photos that everything is still a major work in progress. We've got loose wires, cleaning supplies (and many other things) without a home, and an entire dining room that hasn't been touched yet. Such is life. We progress bit by bit. It's quite a bit "cold" and industrial in here as many of you predicted, but though we have many plans we haven't made any effort to make it cozy yet.

One major reason is because...


What??? What's that gaping hole in the wall??? Yeah, we totally had to dismantle the stove, tear out the back wall and run another support post from the foundation to the roof. Because stuff like that is inevitable it seems. Talk about a setback! The original inspector passed our structural plan without a problem; however, when another inspector came through with an engineer looking at another project we're working on upstairs, he said he really recommended we add that thick row of boards into the wall for extra support. While he didn't require that we do it, he very strongly recommended it. We couldn't really argue with that. So, out came my beautifully functioning stove and range hood, out came the saw, down came the wall and in went the supports. The inspector is coming back this week (allegedly) and we'll be able to close it back up soon.

FYI it's not as bad as it looks... I guess. This project has created tons of dirt and clutter, and it felt like a big step backward to be without a stove again for awhile, but you won't really notice the crack once the wall is closed up. The steel backsplash will cover most of the crack, and the vent cover above the range hood will cover the rest. And we'll gain even more stability out of it.

So there you have it -- the account of the updates and setbacks of our kitchen of late.

I hope to have more things to share soon. I know I always say that... but the 10-month-old dictator in my house only lets me blog on holidays and rare special occasions she makes up at random. Like today, the Fourth of July, during naptime.

Stay cool you guys, particularly those of you who are reading this at Starbucks because you still don't have power at home thanks to that crazy storm last week. Sweaty hugs to you.

4.19.2012

If I had a million dollars...

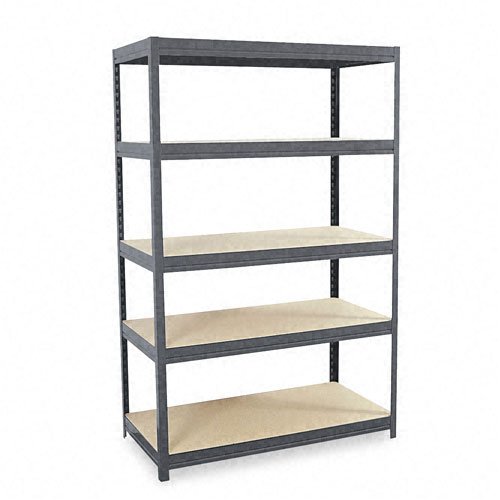
I know not everyone is into the industrial look, and I know it's a home decor trend that will eventually (soon, maybe already) go out of vogue. But I love it so much (so practical!), and it goes so well with our house. So, forget that industrial is trendy and join me in admiring this bookcase from Anthropologie.


Oh, how well this baby would work in our kitchen. Sadly, $1,600 is quite a bit more than I'd ever spend on shelves, which are meant simply to hold the things which hold the actual value. Even if I had a million dollars, I think, I'd still just admire from afar. (I like to think I'd be equally frugal about this kind of thing no matter how much money I had. DIY haircuts! The baby doesn't need toys -- she has a toilet paper tube! That hole in my shoe makes it look cool and edgy! -- These are my mottos.)

This has me thinking though... with a little TLC (spray paint, a little roughed up wood and some casters), this $120 fella on Amazon, made by Edsal, could do the trick for a fraction of the cost.


My wheels are turning, for sure.

I should have a little kitchen update (cabinet doors, fun details, etc.) for you pretty soon, I think. And maybe we'll have some other updates on the near horizon as well. We're gearing up for some major things this summer, and it's exciting. We've been enjoying our family down time so much that we've been taking things very slowly, but we'd like to refinance before interest rates go back up so we have to finish these renovations soon.

None too soon, if you ask me.

3.26.2012

Just a little further.

Talk about watching paint dry... but here is another photo of the wall oven cabinet, taken one little step further.


S got it all trimmed out, and next up is painting the trim and building the doors. We've clearly been using the stove, as you can see by all the miscellaneous crap piled up on it.

Yeah this is totally boring. Sorry. But that's us.

3.08.2012

It's alive!


The oven is in. And it even works. And the cabinet is painted. (I even did one of the coats while S tended to the baby!) Who are we, all of a sudden, making things happen?

I hope to try to bake something in the next few days... but that will require going to the grocery store to buy flour and sugar and vanilla extract since we haven't used any of those things in years.

YEARS.

Somebody get me my apron.

3.07.2012

An Idea


When I was 5, we moved out of a beautiful brick house in town to a crumbly old farmhouse in the country. I was not happy to leave my little friends, my backyard sandbox or the sticker collection on my bedroom window. I eventually grew to love our new house (once my dad's hard work made it habitable), but even though I only lived in my first childhood home a few short years I still have fond memories of it.

My family is often surprised at how much I remember in detail about that house, which makes me realize it won't be long before Johnnie starts caching bits and pieces into her memory bank. (Yikes!) I think I could draw a pretty accurate map of the old house, including the door frame in the basement where my dad recorded our growth, and the braided oval rug in the foyer where we used to play with Micro Machines and have hamster races! (Barney vs. Betty!)

Anyway, the point is that I remember our kitchen radiator had a cabinet around it with perforated sheet metal panels, which popped into my head when brainstorming door ideas for our wall oven cabinet. (That was quite an unnecessarily long lead-in to get to this point, wasn't it?)

S was intrigued when I brought it up, and a little Google search brought me to this Better Homes and Gardens tutorial which I think has sealed the deal for us. We even like the black painted look, as we have some black wrought iron pieces (such as a big row of meat hooks that belonged to my grandfather) that it would play off nicely... whereas the raw steel look might just look like too much steel (as opposed to too much wood if we built wood plank doors).

If all goes as planned, we'll have a functioning oven tonight! Dare I get my hopes up?

PS - My parents' farmhouse (which they've now lived in for 23 years) has a similar radiator cabinet in the laundry room, complete with the perforated panels, but oddly that wasn't the one that spurred this idea. Weird that the house from my toddler years was the inspiration, huh?

3.05.2012

Taking shape


The husband resumed work on the wall oven cabinet on Saturday. He felt bad about working on it a) because it took time away from playing with Johnnie, and b) she cries at the sound of power tools. Poor kid was born in the wrong house.

Regardless, he's doing a bang-up job and I'm excited because baking is the one culinary activity I can add to this marriage. We're still working on a design for the doors for the top and bottom sections to add some much-needed concealed storage.

So yeah, progress. If you don't find this exciting enough, you could always head over to my other blog and read my riveting essay on bras. 

2.18.2012

Like a glove

This is clearly a "during" shot, but we were thrilled to find that the oven fits nicely into its designated nook.

12.19.2011

Kitchen -- the "Before" photos

Not everyone who reads this blog has been fortunate (ahem) to have started from the beginning, so as the kitchen is unfolding, I wanted to pull out some photos from the archives to show you how things got started.

This is what the kitchen looked like when we bought the house. It was divided into two rooms. The log wall along the left side (which is now home to the sink) can give you a sense of the layout compared to what it looks like now.

That beam contraption in the center of this photo is literally holding up the extremely bowed floor above. (And only gravity was holding those timbers in place -- there wasn't a single lag holding anything together.)

The second photo shows the former entrance-slash-kitchen sink area. Yep, this was the first impression you got when entering the house.

And in this final photo, you can see how the fireplace used to be covered with plaster. (It's hiding behind that area with the 3 cabinets going across the top.) We had to have it rebuilt as the bricks were dried out and crumbling.

I can't believe people lived here. And I don't know what possessed us to buy this place... I guess it was a combination of the exposed log walls and the ridiculously low foreclosure price. After a total gut (down to the dirt beneath the floorboards) and a long three years, we're not done yet but we've come a long, long way.

12.18.2011

Kitchen Update


Oh yeah! There's some stuff happening and I like what I see.

Now, things are definitely in a state of flux; the placement of all the tables is just temporary and the rangetop is just sitting on top of an old IKEA dining table for now. But do I care? No I do not. Because the stove is officially open for business! Let's boil something! 

Next steps include:
  • Cutting down and installing the steel backsplash (which we got for free!) behind the stove
  • Hooking up the pot filler faucet
  • Finding a temporary solution for the wall oven (until we build it in to the left of the stove) 
  • Finishing the chinking between the logs. 
Oh yeah, and finally moving the fridge and baking table out of the living room!


And clearly there's a lot to do in this corner... and up the stairs. We're not there yet, but we're well on our way.


My favorite things are the planked walls, the big window and the ceiling beams. Actually, I think I'm going to love most everything about it once it's done someday. For now, I'm just thrilled to be this far along and to have a STOVE THAT ACTUALLY WORKS! Until it was hooked up yesterday, we'd been stoveless for 3 years, 3 months and 13 days.

Post script: In case you are wondering, yes there's a distinct line running down the middle of the floor. Half of the floor had been covered by plastic and barrier paper for protection, and the other half had just been covered by the paper. The plastic held some moisture underneath it which darkened the concrete, so when all the protective layers were removed, that half was darker than the other. Over time, it should even out. But clearly we were distressed when we first made the discovery!

So, what do you think? Are you starting to see the vision come together?